Maps Marker Pro is a WordPress plugin built on the javascript framework leaflet.js, which supports OpenStreetMap and Stamen basemaps out of the box without any additional configuration or mandatory API keys. Maps Marker Pro can be downloaded for free here, for installation instructions please click here.
Maps Marker Pro allows you to display of GPX tracks on marker and layer maps. GPX is a device-independent data format used for GPS navigation devices and supported by many GPS devices. Support for GPX elevation charts and waypoints is available since v4.0-beta1.
If your GPS does not support the export of your tracks as .gpx files, you have to convert them first before you can add them to your maps in Maps Marker Pro. You can use the free online tool http://www.gpsvisualizer.com/convert_input for conversion or GPSBabel:
![]() GPSBabel is free software and lets you move data between popular GPS systems such as those from Garmin, Magellan or a large number of map programs. It supports many different track formats, is available for Windows, MacOS & Linux and can be downloaded here: http://www.gpsbabel.org/download.html
GPSBabel is free software and lets you move data between popular GPS systems such as those from Garmin, Magellan or a large number of map programs. It supports many different track formats, is available for Windows, MacOS & Linux and can be downloaded here: http://www.gpsbabel.org/download.html
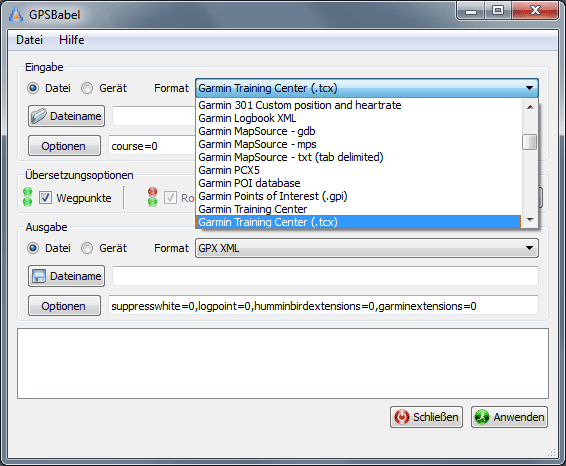
After installation has finished, open GPSBabel and select the input file format from the dropdown. In the screenshot below we are converting a .tcx file which was generated by a Garmin GPS device, so we have to select “Garmin Training Center (.tcx) from the dropdown (screenshots are in German, GPSBabel installs in your language automatically):
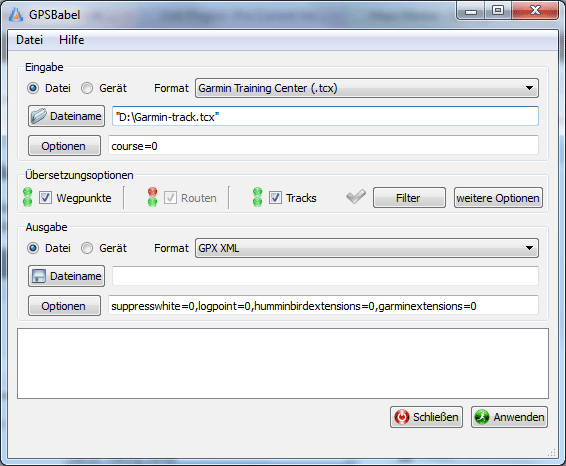
click on the button “Filename” (Dateiname in this screenshot) and select the file you would like to convert:
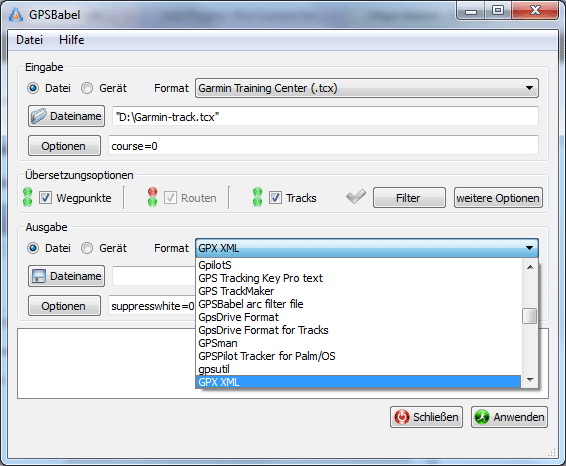
As next step select “GPX XML” as output file format from the dropdown:
As next step click on filename (Dateiname in this screenshot) and select the desired output file name:

click on the button Apply (Anwenden in the screenshot above) to start the conversion into a .gpx file
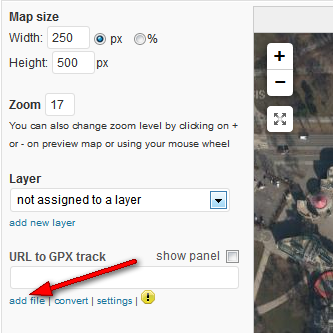
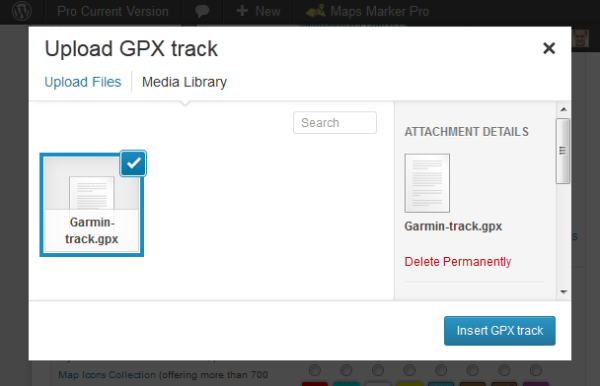
The conversion is now finished. To display the converted .gpx file on your maps, you now have to upload it to your media library by clicking the button “add file”:
After the upload is finished, please select the track you would like to add and click the button “Insert GPX track”:
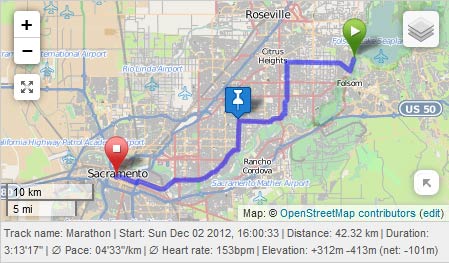
As a result the track automatically gets displayed on your map:
If you have any further questions, please open a support ticket!