Since v4.23 we support Lima Labs tiles which can be configured as optional layer within Maps Marker Pro.
Lima Labs renders all tiles at a tile size of 512 and a scale factor of 2.0. This gives you crisp high resolution tiles. Check out their demo map at https://maps.lima-labs.com/ol.html.
They do NOT use AWS, Cloudflare or Fastly and provide diversity in the event your current provider’s CDN has issues. They provide anglicized place naming in addition to the local naming and operate a global network.
Lima Labs tiles are FREE for any user needing < 20.000.000 tiles yearly (that is a LOT of tiles). Additional tiles can be purchased in blocks of 5,000,000 for $10 and never expire.
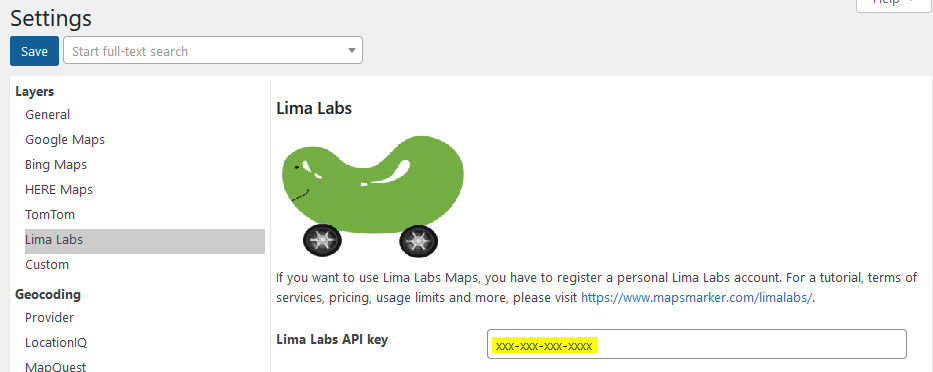
Maps Marker Pro users get additional 5.000.000 tiles for free by signing up for an API key here.
The terms of services can be found at https://maps.lima-labs.com/index.php/aup/
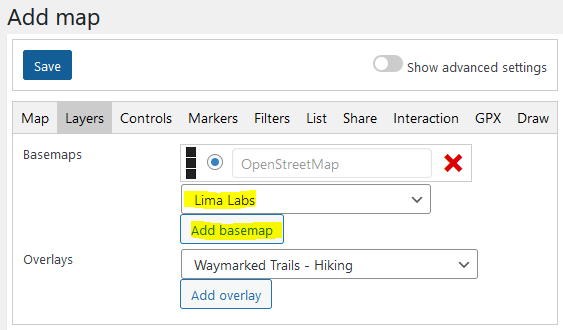
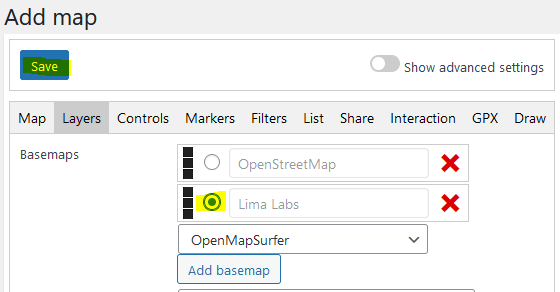
You are now able to use Lima Lab tiles as optional layer for maps: