Please note that we do not provide support with issues resulting from the usage of the MapTiler application – please visit https://support.maptiler.com for MapTiler support!
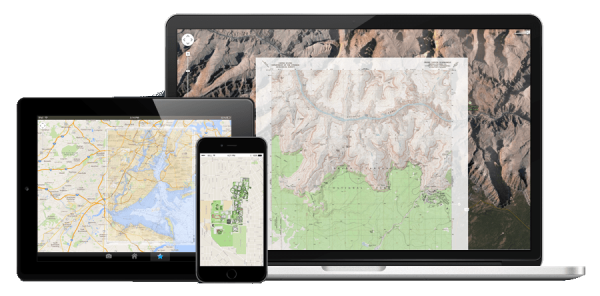
With MapTiler you can turn images into interactive map layers that can be displayed with Maps Marker Pro:
Please be aware that the free version of Maptiler has several limitations (like no Retina support, no custom zoom levels and a watermark being added). To overcome those limitations, you need to upgrade to a premium version of Maptiler.
Tutorial on how to create a custom basemap e.g. from a non-geographical image (based on MapTiler Desktop Free 11.3):
1. Download and install “MapTiler Desktop Free” from https://www.maptiler.com/download/
2. Create a new folder on your computer that will hold the map tiles.
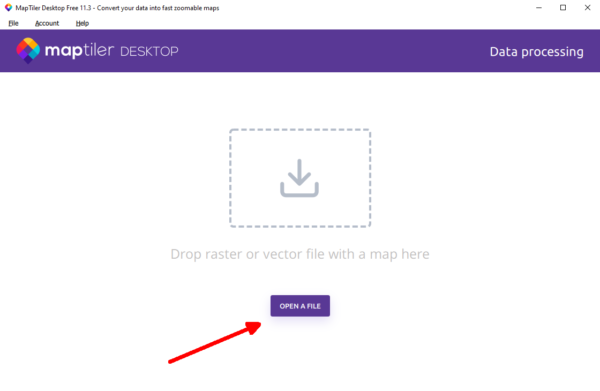
3. Launch “MapTiler Desktop Free”, click on “OPEN A FILE” and select the image you want to turn into a map:
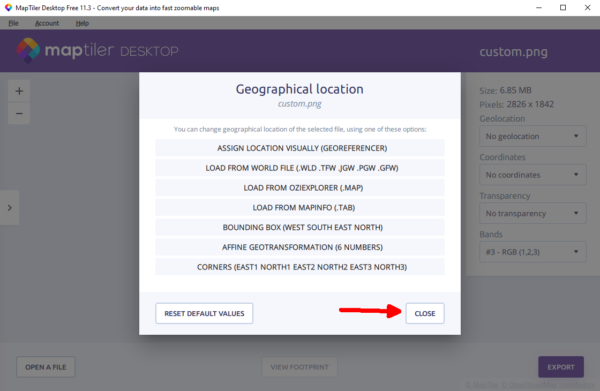
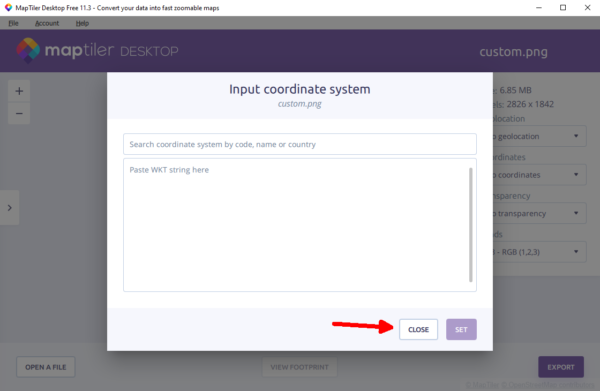
4. Since we are dealing with non-geographical images, you can click on “CLOSE” for both, the geographical location and the input coordinate system:
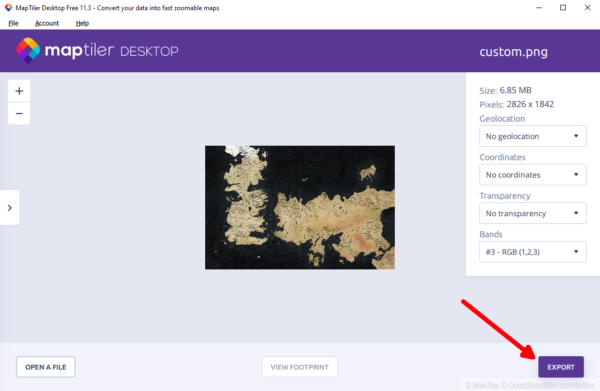
5. Click on “EXPORT”:
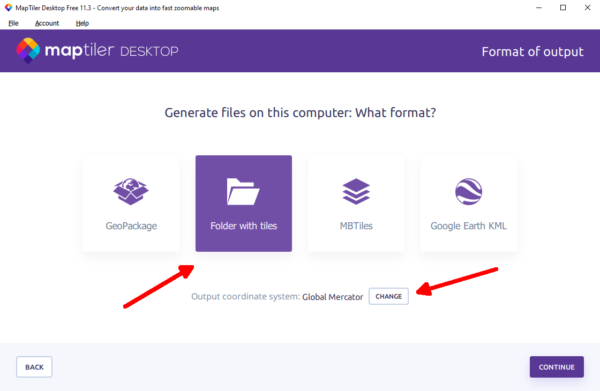
6. Select “Folder with tiles” and click on “CHANGE” next to “Output coordinate system”:
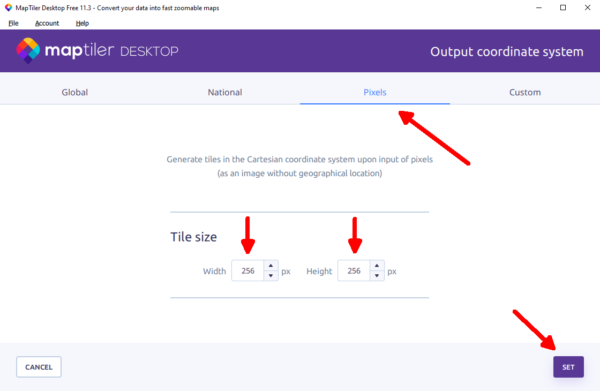
7. Go to the “Pixels” tab and change the tile width and height to 256, then click on “SET”:
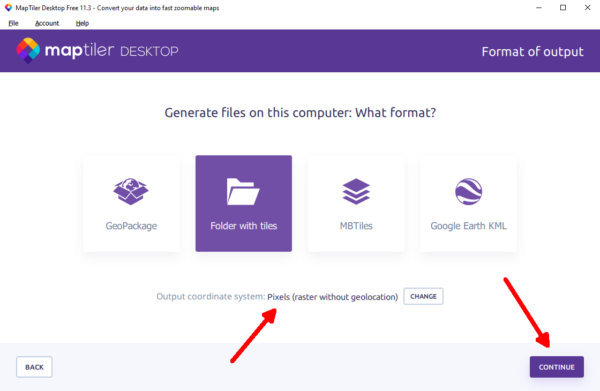
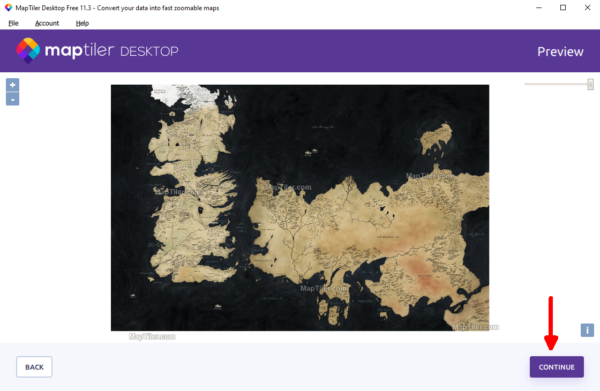
8. Click on “CONTINUE”:
9. Select “no” for transparency and set the compression to “PNG”, then click on “RENDER” and select the folder you created in step 2:

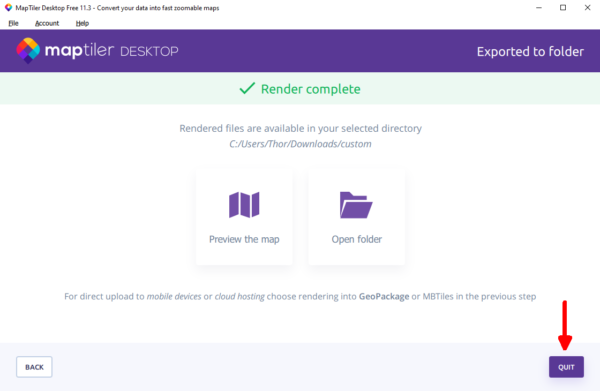
10. The tiles have now been created and you can click on “CONTINUE” and then “QUIT”:
Adding the map to Maps Marker Pro:
To use your map with Maps Marker Pro, you need to upload the folder containing your tiles to a hosting account. This can be done using an FTP program such as FileZilla or through your web host’s control panel.
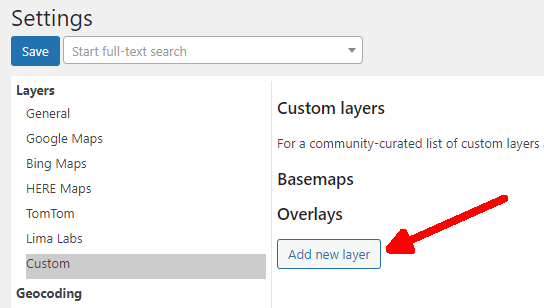
In WordPress, navigate to the Maps Marker Pro settings page, open the “Custom” tab in the “Layers” group and click on the button “Add new layer”:
Make sure to check the option “Raster tiles”.
Also check the option “No wrap” if you do not want the map to repeat at lower zoom levels or when panning past the edges.
Set the tiles URL. This will be the location of the folder containing the tiles, followed by {z}/{x}/{y}.png (e.g. https://www.example.com/map/{z}/{x}/{y}.png).
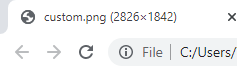
You will also need to set the correct bounds or there will be tile errors when viewing the map. For raster maps, the bounds are height,0,0,width. In our example, the source image was 2826 pixels wide and 1842 pixels high, so the value for bounds would be 1842,0,0,2826. To find the correct values for your map, open your source image with Chrome, for example, to see the dimensions in the tab:
The values for “Min zoom” and “Max zoom” need to be set to the values used in MapTiler. In our example, we didn’t change the defaults, so the correct values are 0 and 4.
Finish by clicking “Save”:

Your custom layer can now be used for your maps. To add it, please proceed as follows:
1. Add a new map or edit an existing map.
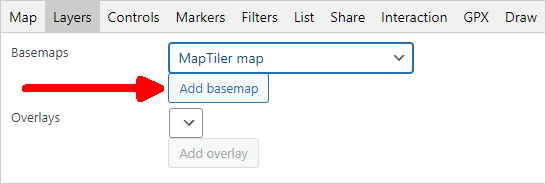
2. Switch to the “Layers” tab and select the created custom layer from the dropdown, then click on “Add basemap”:
Please note that custom maps created with this tutorial are raster maps that are not using a geographical coordinate system and can therefore not be mixed with geographical basemaps like OpenStreetMaps, as the placed markers would end up in unexpected locations when switching between the two types. Make sure to remove all other (geographical) basemaps from the layers tab when using these raster maps.
See a demo of a custom map here.
Subscribe to our newsletter to not miss any news - you can unsubscribe at any time: